A Smart List is a list of leads created by you by adding filters you decide on.
You’ll start with a full list of all the leads in your system, whether they came from your Lead Funnels or you added them manually, and then you’ll add filters based on different criteria within your lead profiles.
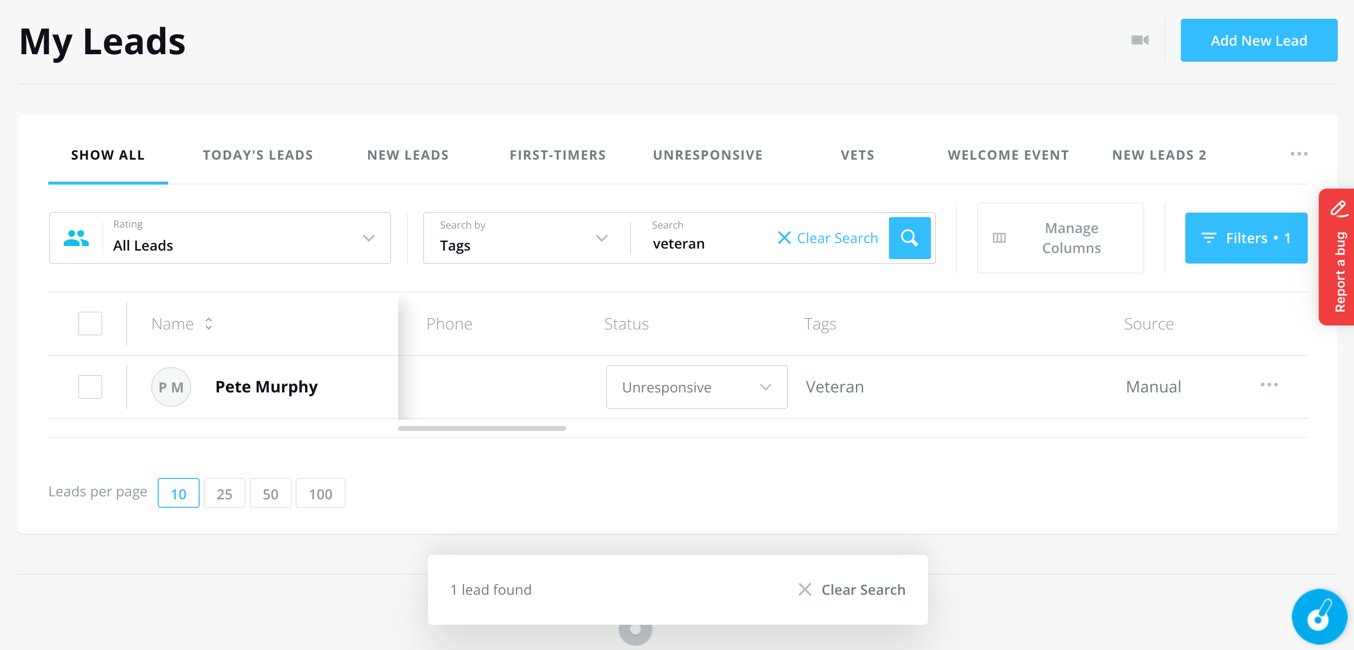
By default, you can already see all your leads from a tab called SHOW ALL on your My Leads dashboard. We also included another list called TODAY’S LEADS that shows all the leads that were added that day.
To create a Smart List, you need to do three things:
The sections below will show you how to do each one.
Step 1: Add Filters
To add filters for a Smart List:
- From the My Leads dashboard, select the SHOW ALL tab so you’re starting from a list of all your leads.
- Then click the FILTERS button on the far right.
A list of FILTER OPTIONS will appear on the right. - Select a Filter Option from the list.

Depending on the filter you select, different radio buttons will appear with conditions specific to that filter.
For example, for Funnel Question and Status, you can either Include leads that meet your criteria or Exclude them.
For Created, you can include leads created Less Than a certain amount of time ago or More Than a certain amount of time ago.
For Funnel Question, you can pull in answers for that question across all your Lead Funnels or only those from a specific Lead Funnel. To do this, use the Filter by Folder and Select Funnel dropdowns that appear. - Select the condition, then enter or select any additional criteria.
NOTE: For Funnel Questions, you may need to click back into the Filter Option to select the question answers you want to include or exclude.
For a full list of the conditions and possible criteria for all Filter Options, see here. - After you add the Filter Options you want, click APPLY.
The system will filter your leads by the options you selected. - To filter by Rating, use the Rating dropdown on the table.

- To filter by a Tag, use the Search by > Tags option on the table and enter a tag name.

Your list of leads will continue to filter as you add each new filter option.
The number of leads that match your filters will display at the bottom. You can add or remove as many filters as you want at any time.
Step 2: Select Leads
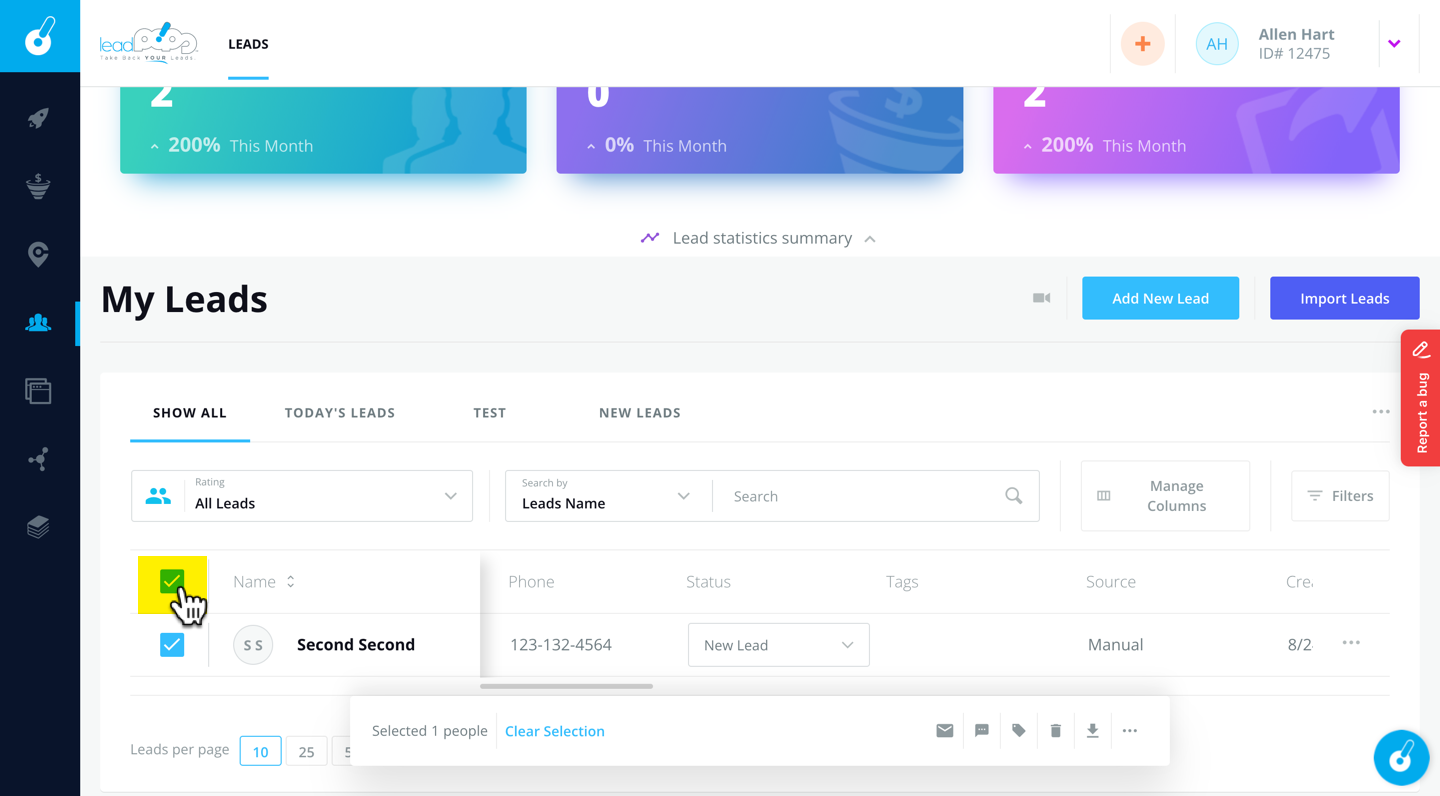
After you apply your filters, look through the leads that match your criteria and decide which ones to include in your Smart List.
- To include all of them, check the Select All box at the top of the list.
- To exclude any, either manually check the leads to include, or check the Select All box, then uncheck the leads to exclude.
When you’re good with the leads in your list, you’re ready to name it and save it.
Step 3: Save Your List
After you’ve applied your filters and selected your leads, you should see a bar at the bottom of the screen telling you how many leads you selected.
From here, you can save those leads as a Smart List or add them to an existing Smart List.
To save your list:
- Click Add to smart list on the bar at the bottom.

- A list of the Smart Lists already in your system will appear.
Click Create a New Smart List.
- Give your new list a Name and Description, then click CREATE LIST.
Keep in mind the name will appear as a new tab at the top of your My Leads table, so you want to keep it short and simple. Add any extra text in the Description to clarify what’s in the list.
Your new Smart List will show up on your dashboard as a new tab under My Leads.
From here, you can sort your list by the different columns, add or remove columns from the table, search for a lead in the list, or even add more filters.
You can also send out an email or text to your list, export the list, or eventually archive and delete leads in the list.
See also: Review Your Leads & Contact Your Leads
Comments
0 commentsPlease sign in to leave a comment.